Use PyText models in your app
Once you have a PyText model exported to Caffe2, you can host it on a simple web server in the cloud. Then your applications (web/mobile) can make requests to this server and use the returned predictions from the model.
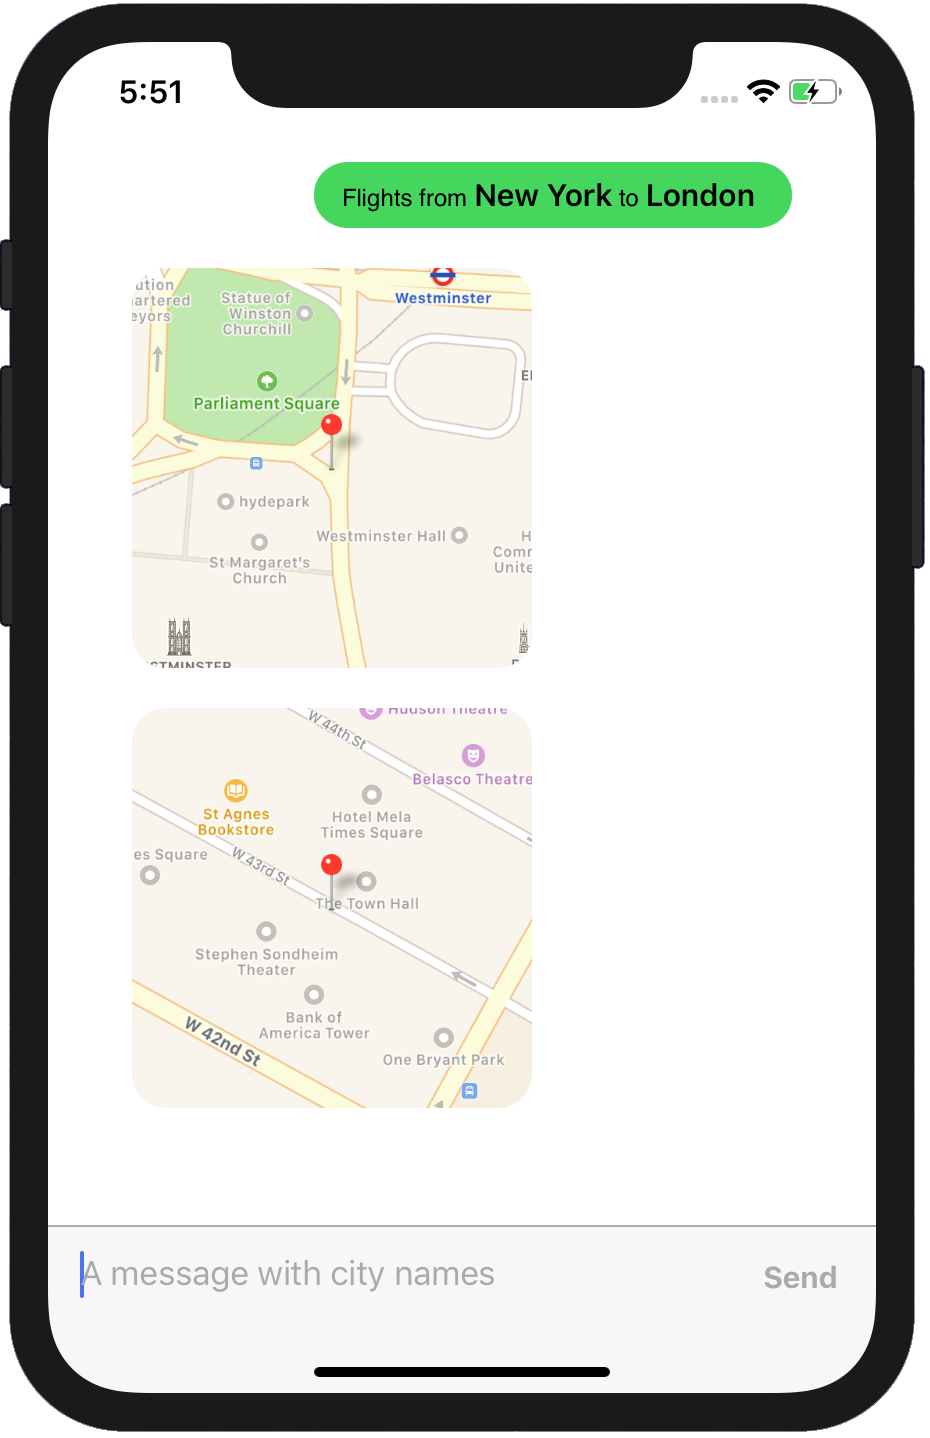
In this tutorial, we’ll take the intent-slot model trained in Train Intent-Slot model on ATIS Dataset, and host it on a Flask server running on an Amazon EC2 instance. Then we’ll write an iOS app which can identify city names in users’ messages by querying the server.
1. Setup an EC2 instance
Amazon EC2 is a service which lets you host servers in the cloud for any arbitrary purpose. Use the official documentation to sign up, create an IAM profile and a key pair. Sign in into the EC2 Management Console and launch a new instance with the default Amazon Linux 2 AMI. In the Configure Security Group step, Add a Rule with type HTTP and port 80.
Connect to your instance using the steps here. Once you’re logged in, install the required dependencies -
$ cd ~
$ wget https://repo.anaconda.com/miniconda/Miniconda3-latest-Linux-x86_64.sh -O miniconda.sh
$ chmod +x miniconda.sh
$ ./miniconda.sh -b -p ~/miniconda
$ rm -f miniconda.sh
$ source ~/miniconda/bin/activate

$ conda install -y protobuf
$ conda install -y boto3 flask future numpy pip
$ conda install -y pytorch -c pytorch

$ sudo iptables -t nat -A PREROUTING -p tcp --dport 80 -j REDIRECT --to 8080
We’ll make the server listen to (randomly selected) port 8080 and redirect requests coming to port 80 (HTTP), since running a server on latter requires administrative privileges.
2. Implement and test the server
Upload your trained model (models/atis_joint_model.c2) and the server files (demo/flask_server/*) to the instance using scp.
The server handles a GET request with a text field by running it through the model and dumping the output back to a JSON.
@app.route('/')
def predict():
    return json.dumps(atis.predict(request.args.get('text', '')))

if __name__ == "__main__":
    app.run(host="0.0.0.0", port=8080)
The code in demo/flask_server/atis.py does the pre-processing (tokenization) and post-processing (extract spans of city names) specific to the ATIS model.
Run the server using
$ python server.py
Test it out by finding your IPv4 Public IP on the EC2 Management Console page and pointing your browser to it. The server will respond with the character spans of the city names e.g.

3. Implement the iOS app
Install Xcode and CocoaPods if you haven’t already.
We use the open-source MessageKit to bootstrap our iOS app. Clone the app from our sister repository, and run -
$ pod install
$ open PyTextATIS.workspace
The comments in ViewController.swift explain the modifications over the base code. Change the IP address in that file to your instance’s and run the app!